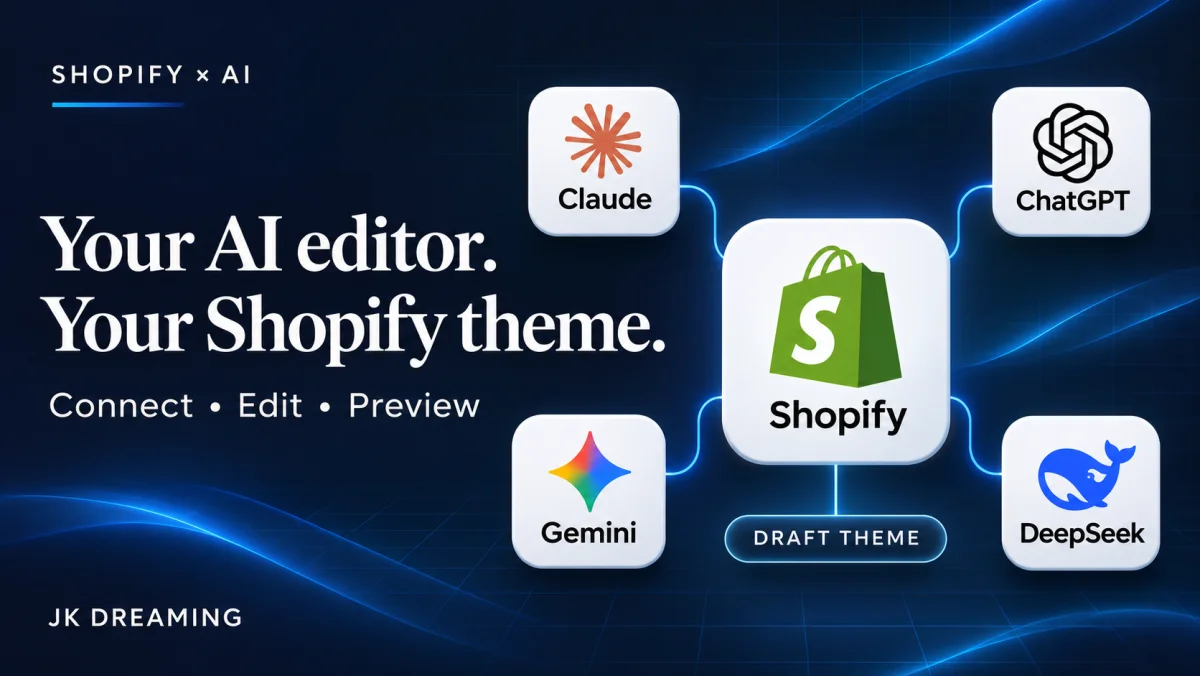
You can use an AI coding editor to update a Shopify theme without repeatedly copying code between a chat window and Shopify's code editor. Give the editor a local copy of your theme, connect that project to Shopify CLI, and work against a draft while you review the changes.
This works with Claude Code, Codex, Gemini CLI, and other coding tools that can read and edit files and run terminal commands. You can also use DeepSeek through a compatible coding editor. The setup depends on the tool's capabilities and your Shopify permissions, rather than the name of the model.
This guide covers the connection, optional credentials, a first editing task, previews, draft uploads, and the checks to make before publishing. The screenshots show a real Dazywood draft theme in Shopify.
How the connection works
The workflow has three parts: your AI editor changes local files, Shopify CLI transfers those files and starts previews, and Shopify hosts the theme. CLI means command-line interface: a program you run from a terminal. Shopify's CLI documentation describes the supported tools and commands.
- Download the selected theme into a project folder.
- Open that folder in your AI coding tool.
- Ask for a specific change and review the file differences.
- Preview the result using Shopify's development tools.
- Upload the reviewed files to a named draft theme.
- Publish separately when the store owner approves the finished theme.
A browser login does not automatically authenticate your terminal. Similarly, a chat that can explain Liquid code does not necessarily have permission to edit files or upload a theme. Check those capabilities before giving it a task.
Choose an AI tool that can work on the project
| Tool | Practical setup | What to check |
|---|---|---|
| Claude | Use Claude Code in the theme folder. | File access, terminal access, and command approvals. |
| ChatGPT / Codex | Use a local Codex workspace or Codex CLI pointed at the theme folder. | The agent is working on the intended local project and can run Shopify CLI. |
| Gemini | Run Gemini CLI in the theme folder. | File tools and shell commands are available under your selected permissions. |
| DeepSeek | Choose DeepSeek inside a coding tool that supports it, such as OpenCode. | The editor supplies file and terminal tools; the provider connection supplies the model. |
Claude Code can edit files and run commands. Codex CLI provides a local coding workflow, and Gemini CLI's shell tool executes local commands. DeepSeek documents an OpenCode provider connection. These are different ways to work on the same folder; you do not need to install every tool.
If your current chat only returns text, you can still ask it to explain or review a change. To apply the change directly, use a workspace with the necessary file and execution tools. A connector that reads products or orders is not proof that it can write theme files.
1. Make a draft copy before editing
In Shopify admin, open Online Store and find the theme you want to use as your starting point. Open its actions menu and choose Duplicate. Give the copy a useful name, such as AI editor working draft. Shopify recommends duplicating a theme before customizing it. See Shopify's duplication instructions.
Keep track of which theme is published and which copy you are editing. A draft can be based on the live theme or another unfinished design. The editor screenshot below has a Draft label beside the theme name; the Publish button is a separate action.
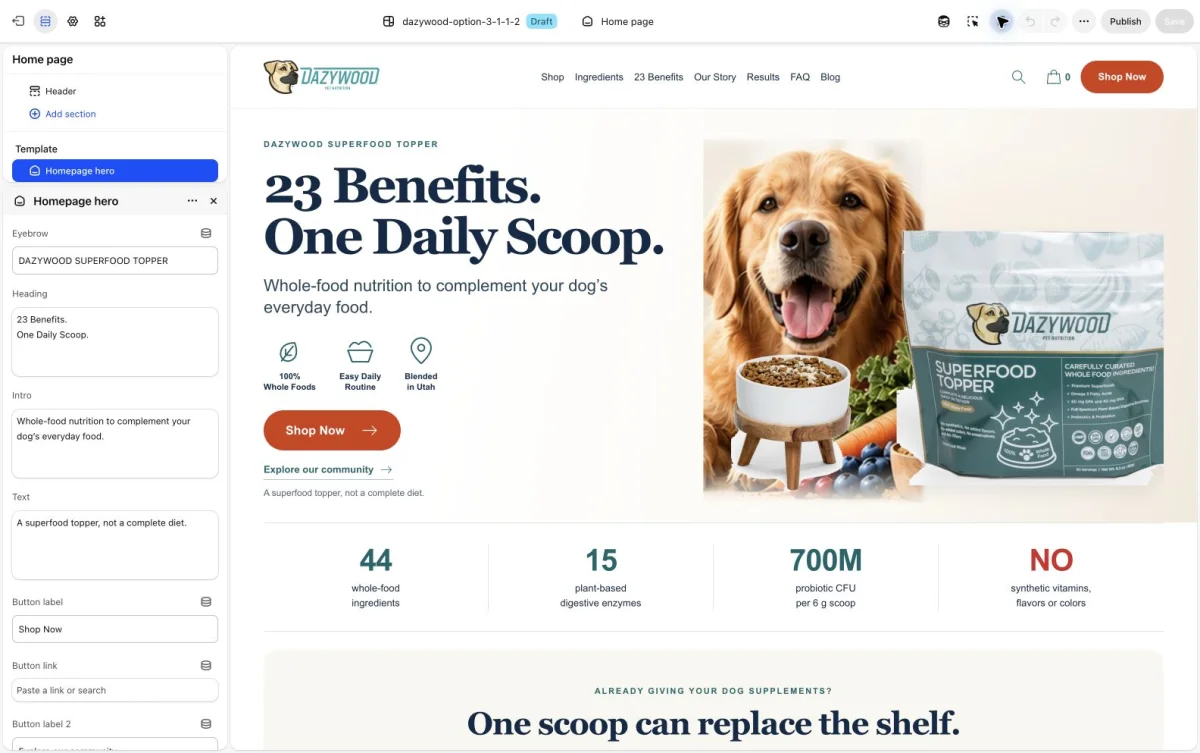
A duplicate theme is not a duplicate store. Shopify says theme downloads exclude resources such as products, collections, menus, pages, and blog posts. Treat catalog, navigation, app, and other store-level changes as separate work. A theme backup alone will not undo all of them.
2. Install Shopify CLI
You need an authorized Shopify account, an AI coding tool, a terminal, Node.js, and Git. Shopify's current CLI requirements specify Node.js 22.12 or later and Git 2.28 or later. Check the current requirements if your installation fails.
Run these commands in your terminal. The installation command uses npm, which comes with a standard Node.js installation.
node --version
git --version
npm install -g @shopify/cli@latest
shopify version
The examples below use a Bash-compatible terminal. On Windows, use WSL or translate the variable syntax for PowerShell. Replace the example store address with the store's permanent myshopify.com address. Your public custom domain may be different.
SHOPIFY_STORE="your-store.myshopify.com"
shopify theme list --store "$SHOPIFY_STORE"
Keep using the same terminal session for the commands in this guide so its variables remain available. The store address and a theme ID identify your destination; neither is an API key.
3. Authenticate with Shopify
For a person working locally, start with Shopify's account login. Running a store command prompts you to authenticate when needed. Sign in with an account authorized for that store. Shopify supports store owners, staff with the Themes permission, and collaborators with that permission; development stores have additional account requirements. Read Shopify's authentication guidance.
After login, run the theme list command again. Confirm that the expected draft appears. If Chrome is already logged in but the CLI still requests authentication, complete the CLI's login flow. They are separate sessions.
You do not need to create a Shopify API key for this account-login route. Avoid creating a broad custom app just to download and edit a theme.
Optional: create a Theme Access password
For a dedicated automation credential, Shopify offers its Theme Access app. This produces a password scoped to theme access. It is not the storefront's visitor password and is not an AI provider API key.
- Open the official Theme Access app listing and install it in the correct store if needed.
- Open Theme Access from Shopify admin.
- Choose Create theme password.
- Enter the intended developer's contact details and create the password.
- The recipient follows Shopify's email link to view the password once. Store it privately.
For unattended CLI use, put the password in a secret store as SHOPIFY_CLI_THEME_TOKEN. Do not put its value in prompts, screenshots, source files, or a command you type while recording. Shopify documents this environment variable in its CLI automation guide.
When access is finished, open the Theme Access Passwords page, choose Delete beside that developer's credential, and confirm. That revokes the password. Removing a local variable alone does not revoke it. Follow Shopify's creation and revocation instructions.
If your editor asks for an AI API key
The AI provider credential pays for or authorizes model access. Shopify authentication authorizes store access. Keep them separate. An editor may support an account subscription login, so follow its sign-in instructions before creating an extra key.
- For OpenAI API access, use your project's API key controls in the OpenAI platform. Create a dedicated secret key and place it in the editor's private provider settings.
- For Anthropic API access, use the Anthropic Console API keys page, choose Create key, name it, select an expiration and the appropriate account or workspace, and use the editor's private credential field.
- For Gemini API access, use Google AI Studio, choose the correct project, and create a key. Our Gemini API key walkthrough explains the steps.
- For DeepSeek API access, use the API keys area in the DeepSeek platform, create a dedicated key, and connect the provider in your coding tool. DeepSeek's API guide links to its credential setup.
See the official OpenAI credential guidance, Claude API key instructions, and Gemini API key instructions for current account and permission requirements.
Name temporary keys for the task so they are easy to find later. Delete or revoke those keys at the issuing provider when the demonstration ends. For recordings, stop capture before creating, revealing, or pasting a secret; resume on a screen that hides it. Redact the entire value in any retained frame. Blurring a published image does not secure an unredacted recording or an exposed key.
4. Download the chosen draft into its own folder
The theme list includes IDs and statuses. Copy the ID of your draft, not the published theme's ID. Replace the placeholder below before running the pull command.
mkdir shopify-ai-working-draft
cd shopify-ai-working-draft
DRAFT_THEME_ID="REPLACE_WITH_YOUR_DRAFT_THEME_ID"
shopify theme pull --store "$SHOPIFY_STORE" --theme "$DRAFT_THEME_ID"
Theme pull downloads the remote theme into the current folder. Start in an empty project directory: pulling into an existing project can overwrite local work and remove files that are missing remotely.
Expect Shopify theme folders such as sections, snippets, templates, assets, and config. Liquid supplies theme markup and logic; CSS controls appearance; JSON files can define templates and saved settings. Shopify's theme architecture guide explains that structure.
Create a local baseline before asking AI to edit. This example is for the new standalone folder above. Add any other credential or private files to your ignore rules before staging.
printf '%s\n' '.env' '.env.*' '.shopify/' 'node_modules/' > .gitignore
git init
git add .
git commit -m "Save theme baseline before AI edits"
Open this folder in your AI editor. Check the folder name in the app before sending a prompt. Running the agent from your website's unrelated codebase will not give it the theme you just downloaded.
5. Give the editor a bounded first task
Start with a change you can recognize and test, such as adjusting the homepage heading on narrow screens. Give the agent the intended outcome and limits. A useful prompt is:
Inspect this Shopify theme and identify the section and CSS controlling the homepage hero. Propose a small mobile typography adjustment that reduces awkward heading wrapping below 480px. Preserve the wording, images, product claims, links, and desktop design. Explain the affected files first. Make the approved local change, run Theme Check, and show the diff. Do not publish, change store data, reveal credentials, or upload files until I approve the target draft and file list.
Review the proposed files before proceeding. A narrow typography task should not require replacing the entire theme, rewriting product claims, deleting app embeds, or changing the catalog. If it does, ask for the reason and reduce the scope.
Keep a short project instruction file that names the store, permitted draft ID, design requirements, and release process. Use the instruction format your editor supports. Written rules help the agent stay on task, but they are not an access-control boundary: a credential can still have broader theme permissions.
Optional: add Shopify's developer context
Shopify's AI Toolkit supplies developer documentation, schemas, validation, and supported store workflows. Its Dev MCP server is an optional way to connect developer resources to compatible editors. MCP is a protocol for exposing tools to an AI application. Adding documentation tools does not by itself authenticate the agent to your store.
Shopify documents this Claude Code setup:
claude mcp add --transport stdio shopify-dev-mcp -- npx -y @shopify/dev-mcp@latestFor Codex CLI, Shopify shows this entry in ~/.codex/config.toml:
[mcp_servers.shopify-dev-mcp]
command = "npx"
args = ["-y", "@shopify/dev-mcp@latest"]
Restart the editor after changing its configuration. Other clients have their own MCP settings. Use the current Shopify AI Toolkit instructions and your client's documentation rather than assuming one client's configuration works everywhere.
6. Preview and test the local change
From the theme folder, start the development preview:
shopify theme dev --store "$SHOPIFY_STORE"With no existing draft ID supplied, this workflow uses a development theme. Open the local preview URL printed by the CLI and keep the process running while editing. Local changes are uploaded for preview; this is not an offline sandbox. A development theme is temporary and differs from the persistent draft you downloaded. See the theme dev reference.
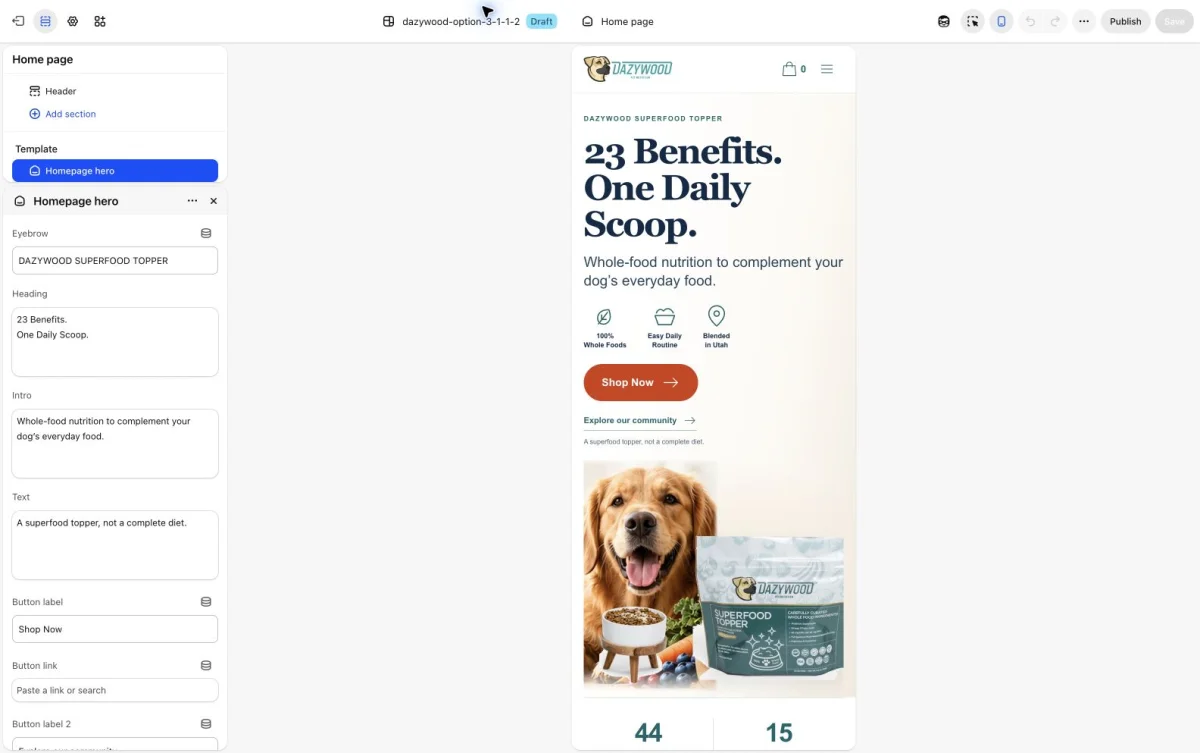
Test the actual result in the browser at phone, tablet, and desktop widths. Read the heading, follow the main call to action, open navigation, and check that the product image still fits. For changes near shopping controls, test variant selection, add to cart, and the cart drawer too. A screenshot cannot establish that those interactions work.
In another terminal opened in the same project folder, run:
shopify theme check
git diff --stat
git diff
Theme Check analyzes theme code for errors and Shopify best practices. Save its baseline findings so you can distinguish existing issues from new ones. Passing the check does not replace visual, keyboard, or purchase-path testing.
7. Upload the reviewed changes to the draft
Before uploading, confirm the draft's current status again. Have teammates pause edits to that draft while you reconcile changes. Review the local diff and the exact files that will be sent.
For a small change, upload an explicit file list. The paths below are examples: substitute the files actually changed in your theme. Run this in the original terminal session where the store and draft variables were set.
shopify theme list --store "$SHOPIFY_STORE"
shopify theme push --store "$SHOPIFY_STORE" --theme "$DRAFT_THEME_ID" --only "assets/your-hero.css" --only "sections/your-hero.liquid" --nodelete --strict
--only limits uploads, --nodelete preserves remote files missing locally, and --strict requires Theme Check to pass without errors. Existing errors can block a strict upload. Review and resolve them before continuing. A push can overwrite selected remote files even when --nodelete is present.
To create a separate unpublished theme from the complete local theme instead, use:
shopify theme push --store "$SHOPIFY_STORE" --unpublished --theme "AI editor review draft" --strictThe first command updates an existing theme ID; the second creates a new draft with the supplied name. Save the new ID returned by Shopify if you create one. Publishing options such as --publish have a different purpose and do not belong in a draft-only workflow. Check Shopify's push options.
Open the returned preview and admin editor links, then confirm the draft name and changed behavior. Test again on Shopify's hosted preview. Upload success establishes that files transferred, not that the design is correct.
Avoid overwriting changes from Shopify's visual editor
A teammate can change settings in Shopify while you edit an older local copy. A later upload may replace their choices. Templates and config/settings_data.json deserve particular care because they can contain the visual editor's saved configuration.
Agree on who is editing the target draft. If the remote copy changed, preserve your local diff and retrieve the remote state into a separate clean folder to compare it before uploading. Do not blindly pull over uncommitted work.
Shopify also offers --theme-editor-sync for synchronizing Theme Editor changes with local files during development. Read its reconciliation behavior before using it; it is not a general solution for every collaborator conflict. See the development synchronization flags.
If the connection does not work
| Problem | Next check |
|---|---|
| Chrome works but the terminal asks for login | Authenticate Shopify CLI separately with the account authorized for the store. |
| The expected theme is missing | Check the store address, account permissions, and theme ID. Use the list command to inspect statuses. |
| AI describes changes but no files change | Confirm that the coding tool has the theme folder open and can use file tools. |
| A preview looks different from the draft | Check whether you opened the temporary development theme, the uploaded draft, or the public store. |
| A strict push fails | Read the Theme Check errors, compare them with the baseline, and fix the blocking issues. |
| A command or flag is rejected | Check your installed version and run the command's --help. Do not add broad permissions to solve a syntax error. |
Questions before you hand over theme access
Can I use this with a published theme?
You can use a published theme as the source for a working copy. Make changes on the duplicate and keep publication as a separate approval. Direct changes to a live theme can affect customers immediately.
Does a Storefront API key let AI change a theme?
It is not a substitute for theme-write authorization. For an API-based theme-writing integration, Shopify's themeFilesUpsert mutation requires write_themes and an exemption from Shopify. A generic custom-app token is not a promise of unrestricted theme editing. Read the current mutation requirements.
Can I switch AI tools halfway through?
Yes, if the next tool can open the same project and use the required commands. Save a checkpoint, record the target draft and outstanding tests, and have one editor make changes at a time. Each tool still needs its own authorized model access.
Will a draft protect all my store data?
Use the draft to isolate theme work. Do not assume it isolates catalog changes, discounts, pages, menus, apps, or other store-wide operations. Keep the agent's task limited to the files and destination you reviewed.
Publish only after reviewing the hosted draft
Give the owner the draft's preview link, changed-file summary, test results, and any unresolved issues. Keep the previously published theme available as a recovery option. When the owner approves the release, publish the reviewed draft through the store's normal process and check the public storefront afterward.
For the next editing session, start from the latest agreed theme state and repeat the same sequence: inspect, change, review, preview, and upload to the chosen draft. That gives the AI enough access to do useful work while keeping the destination and release decision clear.
Take the setup with you
Download the step-by-step skill
Download the guided setup skill, open it in your AI coding tool, and choose your project folder. The skill creates a SHOPIFY-AI-SETUP.md instruction file in that folder, then walks you through authentication, downloading a theme, previewing edits, and saving a reviewed draft.
Compatible with major AI harnesses and LLMs, including Claude, ChatGPT / Codex, Gemini, DeepSeek, and more. Direct editing requires a harness with file and terminal tools; native skill installation varies by tool.

Preview the skill instructions · Public GitHub repository · No API keys included.